So what are the main differences between sticks and bricks waste disposal and your RV? First, there is no worry about getting rid of the waste at your sticks and bricks. You let water splash into the sink and it just disappears down the drain. No matter how much water you put into the sink. You flush the toilet you never have to worry about sewer smell coming back-up and if the toilet gets clogged up you just plunge a few times and presto the waste is gone.
None of the above is true for your RV. If you put too much water down your sink, you will overfill the grey water tank and the wastewater will flow into your bathtub or shower. If you leave your waste slinky hose hooked up with the open/close valve on you RV open you will invite sewer gas and some critters, from the campground into your RV.
Do not leave your black tank dump valve open all the time when hooked to the campground sewer line.
Because your toilet is on top of your black water tank there is a limit to how much waste you can put down there as well. Also if it gets plugged up, plunging it will not help!
So what to do. For the smell problem that might occur in the grey water tank, I use Grey Water Tank Smell Killer. It works. You should put a cup of Dawn Liquid Dish Soap down the kitchen sink once a month to break up grease and oil in the Grey Tank and sink P traps.
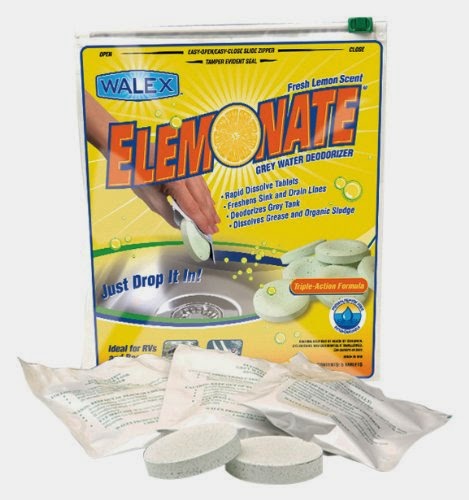 |
| Grey Water Tank Smell Killer |
As for the water back-up, you should dump your grey tank every two days while camping or sooner if the water starts to back up. This is the tank you can dump before you leave for home.
The grey water tank should be the last tank you dump before you head for home. After dumping it you need to add approximately 1 gallon of clean water back into it and one of the grey water tank smell killers and you are good to go.
BLACK WATER TANK
Now the black water tank the scourge of RV camping. There are a lot of does and don'ts about this tank so let's get started.No matter what you hear or read almost all of the sensors that are supposed to tell you how full the black water tank is, do not work. I have been told and it has been proven that the sensors mounted on the outside of the tank do seem to do a better job than those sensors that are inside the blackwater tank. Most of the crazy ideas floating around about how to make the sensors inside the black water tank work also do not work. To fix the problem of, the black water tank sensors and how full is the blackwater tank. So, how do you know when it is time to dump the tank? Look down inside the toilet and if you see blackwater, hear gurgling, and stuff floating, it's time to dump the tank.
So what can you do to improve how the black water tank works.
Use only quick dissolving toilet paper in this tank. Toilet paper made just for RV is fine such as RV 2ply Toilet Paper or septic tank safe toilet paper. But you can use just about any toilet paper that will quickly dissolve. To test any brand of toilet paper to see if it can be used, take a glass jar with a lid. Fill the jar about 3/4 full and add a single sheet of your toilet paper to be tested. Put on the lid and give the jar three quick shakes. If most of the sheet of toilet paper is broken up and coming apart you are ok to use the toilet paper tested.
Check here for more details RV Toilet Paper Safe.
We have safe paper what next? How about something to get rid of the smell and help break down the waste. I would suggest a Black Holding Tank Deodorizer and Dissolver
 |
| Black Holding Tank Deodorizer and Dissolver |
This should be added to your black water tank regularly. I add one tablet after each time I dump my black water tank and another during hot weather if there is a smell problem.
 |
| Oxy-Kem |
Here is another possible black tank treatment Oxy-Kem that comes highly recommended. I have not tried it so I can't comment on how well it works, but I do plan to and will let you know. I did get a chance to try the Oxy-Kem. However, it was not very successful.
Here is an all natural black tank cleaner that really cleans the tank as well as the sensors. I have not tried it myself but all of the reports I am getting say it works. Unique Black Tank Cleaner I have tried this black tank cleaner and found that I did not like it and have stopped using it.
 |
Lately, I have been using Firebelly Outfitters, Tank Deodorizer. I use two packs of the deodorizer per black tank.

I have used the product for several months now and have found positive results so far. Another positive thing is that the people who make and sell this product are RVers.
Do not dump your black tank unless it is full or nearly full. I know what you must be thinking but we never get it full over a weekend trip. I realize that maybe the case but, you need to fill it up manually and dump it before you leave the park.
You do not need a hose or make this a big deal just flush the toilet and insert one of these things.
Johnny Chock |
| Johnny Chock |
Let the toilet run for approximately 10 to 15 minutes depending on how full your tank is. If you can see the water in the black tank from the toilet that is full enough. Remove the Johnny Chock and store. Now dump the black tank like you usually do. Add about a gallon or more of water (you can run the toilet with the Johnny Chock for 2 to 3 minutes and that should do it. Drop in one of your black tank tablets and you are ready for the next outing.
Never leave the black tank drain valve open. You are just asking for the smells of your neighbor's sewer to come up into your RV. Or if you are really unlucky you could get the "black pyramid of death". Because the liquid drains out of the open drain valve quickly the black solids are left behind and start to pile up. If air gets into the tank from the open valve and drys out the solids you are really in trouble. Or if you dump your black holding tank too frequently you will also have a build up of the solid waste. This is a problem you do not want the black pyramid and could cause a very expensive repair. To prevent the "pyramid of death" you need to flush your black tank when it is at least 3/4 full and refill it so that there is some water splashing inside as you drive back home.
One of the things you hear and I have tried is to add one cup of cheap dishwashing liquid soap to break-up waste and Calgon to lube the inside of the tank. Does it work? I have been using it and have not seen much of an improvement. I plan on using this in the grey water tank next to see if it makes a difference to that tank.
Quick Guide To Waste Tank Dumping
- Grey Water Tank can be dumped anytime.
- Use a tank treatment when needed. (to reduce smell and add microbes)
- Dump Black Tank when at least 3/4 full.
- Add a small amount of water to both tanks after dumping. (up to 2 gallons)
- Use the grey water to flush out sewer hoses.
Until Next Time.


