Showing posts with label Disposal. Show all posts

Sunday, April 14, 2019

RV Fridge - Get It Cold & Keep It Cold

Do you find that your RV refrigerator does not keep your food cold enough?  Does your RV fridge have its own unique smell?  Do you know how to chill down a warm RV fridge?
Many of us store our RV in places that do not have electricity for us to keep the fridge plugged in and working all the time or even a few hours before we take off for a fun-filled and safe camping adventure.
So let's talk about the care and feeding of an RV refrigerator.


1.   I hope you do not keep the fridge sealed as tight as a drum during storage.  You need to leave the door cracked open just a bit so that air can move in and out of your fridge. This helps keep the inside of the fridge dry and reduce mold build up.  Did you ever wonder what that slide button on the fridge door is used for? Well to lock the door during travel to be sure but, if you slide the button so that you are locking the fridge door while the door is being held open the slide lock can be used to keep the fridge door from closing during storage. Be sure your fridge is as clean as possible before you close the door on the RV.  Making sure the fridge is clean will help stop the growth of mold inside of the unit.  Also if possible you should use Naturally Activated Charcoal Odor Absorber like this one; RV Activated Charcoal

RV Activated Charcoal


This little odor eater would hang from a shelf at the back of the fridge to help keep odors out.  You can also use a box of baking soda but that can spill going down the road and make quite a mess. 

2. What can you do to get the fridge colder quicker once you get to the campground or on the way?  You could buy a bag of ice and put it on the top shelf of the fridge next to the silver fins at the back.  You could buy some cheap cold packs That look like this;
Cheap Cold Packs

Freeze them (usually three) and use them in place of the ice.  Very little if any water to clean up.  Or you could get some Zip Lock Heavy Duty Freezer Bags and put ice cubes from your home freezer in them and use them in place of the bought ice. Another idea for an ice pack is to partially fill a strong zip-type sandwich bag with Dawn dishwashing liquid, close and freeze. The liquid soap stays cold much longer and it can be refrozen many times. The frozen Dawn will conform to the place you need an ice pack. Maybe a bit more water to clean up than you would like.
The Nu-Ice Freezer Pack is a  chemical freezer pack capable of maintaining a sub-zero temperature by putting the pack into an insulated environment for up to 96 hours. This is accomplished by first freezing the special pack to initiate the simple chemical reaction within the pack. 


But you could do even better and help the ice or cold pack by adding an RV fridge fan like this one; RV Fridge Fan.
RV Fridge Fan

It uses 2 D cell batteries (be sure to use alkaline type) and will give you 30 days of use before the batteries need to be changed.  It will reduce your fridge cool down time by half. I use one in my TT and it does work. (just be sure to turn it off before storing the rig).

I know some of you are a bit more high tech than a simple battery operated fan inside the fridge and would like something a bit more.  I reference you here; High Tech RV Fridge Fan.

CAUTION:  Do not run your RV Fridge on GAS while going down the road.  Guys this is very dangerous for a lot of reasons and not recommended by anyone in the know that I have talked to.   I am sure someone will tell you that they have done it for years with no problems.  But it only takes one time, of a fire or explosion or both.

3. What else could you do to help your RV fridge?  You could put a fan on the backside of the fridge inside the outside fridge compartment.  I am talking about the outside compartment in the back of the fridge.  There are several types of this kind of fan.  One type uses a thermostat to sense when there is too much heat, inside the outside compartment, thus slowing down cooling, and turns on the fan.  Or there is the DIY system that uses a 12-volt computer fan that comes on whenever power is turned on to the rig (this is what I use).  Let's look at them both, first the thermostat controlled fridge compartment fan; RV Fridge Outside Compartment Fan
 There is some DIY here as well but a lot less than the system that I use.  Follow the link and read some of the user comments to better understand how this system works.
 RV Fridge Outside Compartment Fan

Next, let's take a look at the one I used; 12 Volt Computer Fan


This is a completely DIY project so please remember that.  I found a convenient place on the inside of the outside refrigerator compartment's grated grill cover and mounted the fan with some zip ties.  I ran the power wire from the fan to the rigs 12-volt power line, that I found inside the refrigerator compartment.  My 12-volt lines were the same color as the fan's wiring. The fan blows air across the fins on the outside of the fridge located inside the fridge compartment.  The power draw is so small I did not worry about it and the fan runs whenever the rigs 12-volt system is on.  The fan is designed to be used in a computer so is whisper quiet. Boy does it work.

4. So we have the fridge getting cold but how cold is it and when can I put in some food?  Well if you do not have a thermometer to measure the temperature then how do you know?  There are two kinds of thermometers one is digital and one is analog.  Let's look at them both.
Digital RV Thermometer Digital RV Thermometer

Digital RV Thermometer
The unit has two sensors one for the freezer and one for the fridge.  The unit runs off batteries and can tell you at a glance from the outside of the refrigerator unit what is going on inside and when your unit is cold enough for food.
Analog RV Thermometer; Analog RV Thermometer
 Analog RV Thermometer
This simple unit hangs from one of the shelves in the fridge and tells you when it is safe to put in your food. The negative thing is that you have to open the fridge to tell if it is ready, letting in more hot air and letting the cold air out.  I am saving for the digital version.

Well, we've got your RV refrigerator humming along but, it is time to go home and park the rig until the next time.
How can you get it cleaned out and dried out fast?  One of these guys should help; Inexpensive Hair Dryer
Inexpensive Hair Dryer
Because I do not dry camp I have the power needed to use this, to dry out the fridge and freezer fast and get going home. Darn, the ice cream is going to melt again.


Until next time.

Sunday, March 24, 2019

Does Your RV Sewer Drizzle & Drool?

Are you afraid to loosen the RV Sewer Cap on your RV because it may drizzle some sewer liquid on your camping shoes or boots?  Do you always have to put a bucket underneath the RV sewer outlet because liquid waste may drool out on the ground and stink up the area?


Well, do I have the solution for you.  There are a lot of reasons why the sewer outlet may leak. A bad shut-off valve, a bad seal somewhere down the line, or even the fact that the RV was not level and the drain could not fully empty.  No matter what the reason the following end of the line shut-off valve will stop the problems.
End Of Wast Line Shut-Off Valve 
 This valve goes on the end of the sewer line and prevents sewer line drizzle and drools.  Following the instructions add this valve to the end of the sewer line and continue to use the sewer cap you already have.
I also strongly suggest that you use a 45-degree clear fitting as the first fitting you put on the sewer pipe after removing the sewer cap.
45 Degree Sewer Pipe
This fitting allows you to see what is coming out of the tank and when the flow is at an end.  You do want to know if that fancy RV toilet paper really does dissolve quickly right?
Please continue reading this Blog to find out more about the sewer and holding tanks in your RV and their proper care and feeding.

And as always wear rubber gloves when handling sewer components.  This is for your safety.
RV Rubber Sewer Gloves


Until next time.

The Weekend RVers is a Facebook Group on RVing with Hints & Tips. A group for the Full-timer as well as the Newbie or Wanna B. In case U can't find us "Facebook.com/groups/Weekend.RVers" we are here hoping you will join us!

And finally, please remember that this blog is an Amazon affiliate. When you order something through any of the Amazon links, it doesn’t add anything to your cost, but I do earn a small commission on everything you buy. Just click on an Amazon link, then shop as usual.

Monday, February 25, 2019

The RV Waste Treatment Tanks (The Black & Grey)

I do not plan on explaining how to dump the grey and black tanks on your RV.  What I would like to do is to explain how to stay out of trouble in dumping your tanks and dis-spell some of the myths on when to dump your tanks.


So what are the main differences between sticks and bricks waste disposal and your RV?  First, there is no worry about getting rid of the waste at your sticks and bricks.  You let water splash into the sink and it just disappears down the drain.  No matter how much water you put into the sink.  You flush the toilet you never have to worry about sewer smell coming back-up and if the toilet gets clogged up you just plunge a few times and presto the waste is gone.

None of the above is true for your RV.  If you put too much water down your sink, you will overfill the grey water tank and the wastewater will flow into your bathtub or shower.  If you leave your waste slinky hose hooked up with the open/close valve on you RV open you will invite sewer gas and some critters, from the campground into your RV.
Do not leave your black tank dump valve open all the time when hooked to the campground sewer line.
Because your toilet is on top of your black water tank there is a limit to how much waste you can put down there as well.  Also if it gets plugged up, plunging it will not help!
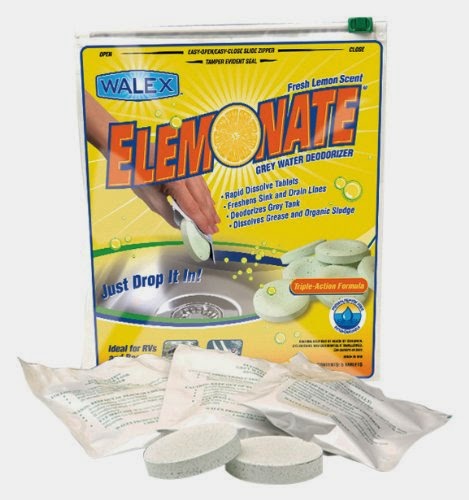
So what to do.  For the smell problem that might occur in the grey water tank, I use Grey Water Tank Smell Killer.  It works. You should put a cup of Dawn Liquid Dish Soap down the kitchen sink once a month to break up grease and oil in the Grey Tank and sink P traps.
Grey Water Tank Smell Killer

As for the water back-up, you should dump your grey tank every two days while camping or sooner if the water starts to back up.  This is the tank you can dump before you leave for home.
The grey water tank should be the last tank you dump before you head for home.  After dumping it you need to add approximately 1 gallon of clean water back into it and one of the grey water tank smell killers and you are good to go.
BLACK WATER TANK

Now the black water tank the scourge of RV camping.  There are a lot of does and don'ts about this tank so let's get started.
No matter what you hear or read almost all of the sensors that are supposed to tell you how full the black water tank is, do not work.  I have been told and it has been proven that the sensors mounted on the outside of the tank do seem to do a better job than those sensors that are inside the blackwater tank.  Most of the crazy ideas floating around about how to make the sensors inside the black water tank work also do not work.  To fix the problem of, the black water tank sensors and how full is the blackwater tank.  So, how do you know when it is time to dump the tank?  Look down inside the toilet and if you see blackwater, hear gurgling, and stuff floating, it's time to dump the tank.
 So what can you do to improve how the black water tank works.
Use only quick dissolving toilet paper in this tank.  Toilet paper made just for RV is fine such as RV 2ply Toilet Paper or septic tank safe toilet paper.  But you can use just about any toilet paper that will quickly dissolve.  To test any brand of toilet paper to see if it can be used,  take a glass jar with a lid.  Fill the jar about 3/4 full and add a single sheet of your toilet paper to be tested.  Put on the lid and give the jar three quick shakes.  If most of the sheet of toilet paper is broken up and coming apart you are ok to use the toilet paper tested.

Check here for more details RV Toilet Paper Safe.

We have safe paper what next?  How about something to get rid of the smell and help break down the waste. I would suggest a Black Holding Tank Deodorizer and Dissolver
Black Holding Tank Deodorizer and Dissolver

This should be added to your black water tank regularly.  I add one tablet after each time I dump my black water tank and another during hot weather if there is a smell problem.
Oxy-Kem 


Here is another possible black tank treatment Oxy-Kem that comes highly recommended.  I have not tried it so I can't comment on how well it works, but I do plan to and will let you know.  I did get a chance to try the Oxy-Kem.  However, it was not very successful.

Here is an all natural black tank cleaner that really cleans the tank as well as the sensors.  I have not tried it myself but all of the reports I am getting say it works. Unique Black Tank Cleaner  I have tried this black tank cleaner and found that I did not like it and have stopped using it.


Lately, I have been using Firebelly Outfitters, Tank Deodorizer.  I use two packs of the deodorizer per black tank.

I have used the product for several months now and have found positive results so far.  Another positive thing is that the people who make and sell this product are RVers.

Do not dump your black tank unless it is full or nearly full.  I know what you must be thinking but we never get it full over a weekend trip.  I realize that maybe the case but, you need to fill it up manually and dump it before you leave the park.
You do not need a hose or make this a big deal just flush the toilet and insert one of these things.
 Johnny Chock


Johnny Chock
          
Let the toilet run for approximately 10 to 15 minutes depending on how full your tank is.  If you can see the water in the black tank from the toilet that is full enough.  Remove the Johnny Chock and store.  Now dump the black tank like you usually do.  Add about a gallon or more of water (you can run the toilet with the Johnny Chock for 2 to 3 minutes and that should do it.  Drop in one of your black tank tablets and you are ready for the next outing.

Never leave the black tank drain valve open.  You are just asking for the smells of your neighbor's sewer to come up into your RV.  Or if you are really unlucky you could get the "black pyramid of death".  Because the liquid drains out of the open drain valve quickly the black solids are left behind and start to pile up.  If air gets into the tank from the open valve and drys out the solids you are really in trouble.  Or if you dump your black holding tank too frequently you will also have a build up of the solid waste.  This is a problem you do not want the black pyramid and could cause a very expensive repair.  To prevent the "pyramid of death" you need to flush your black tank when it is at least 3/4 full and refill it so that there is some water splashing inside as you drive back home.

One of the things you hear and I have tried is to add one cup of cheap dishwashing liquid soap to break-up waste and Calgon to lube the inside of the tank.  Does it work?  I have been using it and have not seen much of an improvement.  I plan on using this in the grey water tank next to see if it makes a difference to that tank.


Quick Guide To Waste Tank Dumping
  1. Grey Water Tank can be dumped anytime.
  2. Use a tank treatment when needed. (to reduce smell and add microbes)
  3. Dump Black Tank when at least 3/4 full.
  4. Add a small amount of water to both tanks after dumping. (up to 2 gallons)
  5. Use the grey water to flush out sewer hoses.


Until Next Time.


Saturday, July 9, 2016

Well, What Did You Forget This Time?

Whether you are a new Full Timer, a Newbie, a Part Timer, or a Weekender we all seem to forget something vital to our RVing enjoyment or safety at the beginning of each season.  What do you really need to have to hook up your RV and have a safe but fun RVing experience? To find out I asked a bunch of Facebook RVers to give me a list of their most important, not to be forgotten, "must haves" for the RV before you pull out.  Here is the list in no particular order.


1. Power Cord to hook up the RV along with an extension cord. You need enough to go to either end of your RV.
http://amzn.to/1R7Y3vP
15 Ft 50 Amp Extension Cable
http://amzn.to/1bYJI4w
25-Ft 30 Amp Extension Cord

2.  An extension drinking water hose is a must.  You should have a 25-foot regular hose and a 25-foot extension.
http://amzn.to/1bYKQoC
25 Foot Drinking Water Hose

I make the assumption  that you already have a drinking hose with you.  If not, you are going to need one.  Get a 25 foot one for everyday use and another 25 foot as the extension. (I once stayed at a park where the water was on one side of the TT and the electric was on the other side of the TT.)

3. Another good thing to have is a Water Hose Splitter for the park supply line. That way if you  need some additional outside water you will not need to unhook the water supply to the rig.
http://amzn.to/1AATIH7
Plastic Water Hose Splitter
4. Extra sewer hose is a must these days.  With longer rigs you can't leave home without it.
http://amzn.to/1E2ycwr
10 Foot Sewer Hose Extension

5. In addition, to the hose extension you should also have a short clear section of sewer pipe to keep an eye on what is coming out of the sewer and to know when it is done draining.
45 Degree Clear Fitting
With the above fitting you can really see if that new RV TP really is quick dissolving.

6. In some States and in some RV Parks you must raise the sewer line off the ground.  It is the law.  There are lots of idea floating around but here is one of the simplest.  Remember in some States this is required.


Sewer Hose Stand


7. If the park you are staying at has Cable TV you will need some TV cable to go from the Utility Box to the rig.
25 Ft RG6 Cable TV Wire
8. How about better tasting water?  Please read the Blog Post on "Water Out Of The Campground Faucet, YUCK!!" for all the best options but, here is just one.
RV Water Filter
9. A good tire pressure gauge is vital for any RVer.  A cheap one is not an option.  As always check your RV tires when Cold.
Good Digital Tire Gauge
10. Wheel Chocks are the next must have item.  Oh, the Horror Stories I could tell.  Get some Chocks.
RV Wheel Chocks for Pull Behind RVs.

11.  For reasons of safety and anti-theft I also recommend an X-Chock.
Locking Chock
12. A spare set of water hose washers is a good idea.
Water Hose Washers
13. And by all means an RV 30 or 50 amp (depending on your RV's power requirement) Power Management Protector (Surge Protector).

30 Amp Surge Protector
50 Amp Surge Protector


Just be sure to get one that works with your Rig.

14. A Water Pressure Flow Manager would be a good thing as well.  This limits the water pressure to your Rig to no more than 50 psi of water pressure in your RV's plastic water pipe system.  Much more than that and you might start to blow water fittings.

Water Pressure Regulator
Water Pressure Regulator With Meter

14.5 If you use a Water Hose Splitter, like number 3 above for cleaning out your RV sewer hose then you should have a water Back Flow Preventer like
This little unit attaches to the hose splitter and prevents and water hose connected to the open side of the hose splitter from leaking water back into the water source and contaminating it.  Like when you wash out the sewer hose or the spare hose falls into a puddle. 

15. Often times people will suggest that you take boards with you to level the Rig in a campsite that is not level.  While boards may work they add weight and can absorb water when left on the ground during rain.  Here is an alternative.
RV Ramp/Leveler


16. You will not want to forget some RV Dog Bones.  These adapters change your electrical hookups from one type to another.  For example from 50amp to 30amp.  Why because the campground only has 30amps. Please read "RV Dog Bones What Are They and How Are They Used" further down in this Blog for more details.
Adapt 50amp Plug to 30amp Plug

17. You should also carry a water hose for everything but drinking.  Wash the kids feet, flush the sewer hose, etc.  You get the picture.
General Duty Water Hose
18. You should also have a spray bottle of disinfectant to use on park water taps.
Spray Disinfectant

Feel free to add your Can't Be Left Behind" items to the comments area.


Until next time.

The Weekend RVers is a Facebook Group on RVing with Hints & Tips. A group for the Full-timer as well as the Newbie or Wanna B. In case U can't find us "Facebook.com/groups/Weekend.RVers" we are here hoping you will join us!

And finally, please remember that this blog is an Amazon affiliate. When you order something through any of the Amazon links, it doesn’t add anything to your cost, but I do earn a small commission on everything you buy. Just click on an Amazon link, then shop as usual.

Sunday, May 22, 2016

STOP!! Bugs From Sticking To Your RV

This is the dreaded part of the year because of our friendly bug population has been attacking our fine looking RVing Rigs.  So after a trip, during a trip, or before storing what do you do, what can you do, and what should you do to stop bugs from ruining your RV's exterior?


1. Always start with a clean rig.  There are a lot  of products out there to clean an RV but here are a couple that I have used that have really worked for me.  (Your mileage may vary)
Dry Wash
Use this when you have no water available or it is prohibited to use water.
RV Wash
If you have water then this stuff really works.

On Facebook the follow RV Wash was strongly recommended.
Facebook Recommended RV Wash
I have not tried the Facebook RV Wash myself so I can't comment on it.

You will need some help reaching all the way up to the top of the Rig, so an extension scrubbing brush is in order.
RV Wash Brush


2. OK now that you have the Rig CLEAN now what can you use to keep the bugs off your Rig.  Nothing, the bugs will always be there. But you can make them fall off easier during washing and maybe not stick to your Rig after you and they collide.

Rejex Synthetic Vehicle Wax 

"Thin-film polymer coating designed to provide a high-release surface. Prevents stains and adhesion of common contaminants such as exhaust, bugs, oil, tree sap, bird droppings, road grime."
This stuff makes it much harder for bugs to stick onto the surface of the Rig and if they do, the bugs slide off easier during the wash cycle.

I have never tried this but have been told that it really works.
Lemon Pledge Makes Bugs Slide Off
I have used the following with some luck. It also puts a UV blocker on the Rig to slow up Sun Fade.
RV Bug Slider with Sun Blocker
Here is the first Facebook recommendation.
Fiberglass Cleaner and Polish
I have read good things about Gel-Gloss and my wife used it for years in our shower.

The second Facebook recommendation is shown below.

Ice Liquid Synthetic Wax, Innovative New Technology Blends Silicone & Organic Polymers To Provide Extraordinary Shine & Durability To Your RV Finish, Nationally Advertised Apply In The Sun Leaves No Residue, Quickest Easiest Wax To Apply & Use.

The ICE Polish is the latest thinking from the RV community on an easy to apply and remove and it makes bugs slide right off.


3. OK, one more thing you will need for the above polishes to wax on, wax off.
Micro Shine & Clean Towels
4. If you have read this far then I will give you the latest bug remove secret. Dryer Sheets, that's right.  The sheet will remove bugs quickly even if it is a used sheet.  So start saving you old used dryer sheets to remove RV splattered on dried out bugs.
Fastest Bug Remover In The West


Until Next Time.

The Weekend RVers is a Facebook Group on RVing with Hints & Tips. A group for the
Full-timer as well as the Newbie or Wanna B. In case U can't find us "Facebook.com/groups/Weekend.RVers" we are here hoping you will join us!

And finally, please remember that this blog is an Amazon affiliate. When you order something through any of the Amazon links, it doesn’t add anything to your cost, but I do earn a small commission on everything you buy. Just click on an Amazon link, then shop as usual.

Shop Amazon Warehouse Deals - Deep Discounts on Open-box and Used Sports Equipment