Showing posts with label Tank Flush. Show all posts

Sunday, April 14, 2019

RV Fridge - Get It Cold & Keep It Cold

Do you find that your RV refrigerator does not keep your food cold enough?  Does your RV fridge have its own unique smell?  Do you know how to chill down a warm RV fridge?
Many of us store our RV in places that do not have electricity for us to keep the fridge plugged in and working all the time or even a few hours before we take off for a fun-filled and safe camping adventure.
So let's talk about the care and feeding of an RV refrigerator.


1.   I hope you do not keep the fridge sealed as tight as a drum during storage.  You need to leave the door cracked open just a bit so that air can move in and out of your fridge. This helps keep the inside of the fridge dry and reduce mold build up.  Did you ever wonder what that slide button on the fridge door is used for? Well to lock the door during travel to be sure but, if you slide the button so that you are locking the fridge door while the door is being held open the slide lock can be used to keep the fridge door from closing during storage. Be sure your fridge is as clean as possible before you close the door on the RV.  Making sure the fridge is clean will help stop the growth of mold inside of the unit.  Also if possible you should use Naturally Activated Charcoal Odor Absorber like this one; RV Activated Charcoal

RV Activated Charcoal


This little odor eater would hang from a shelf at the back of the fridge to help keep odors out.  You can also use a box of baking soda but that can spill going down the road and make quite a mess. 

2. What can you do to get the fridge colder quicker once you get to the campground or on the way?  You could buy a bag of ice and put it on the top shelf of the fridge next to the silver fins at the back.  You could buy some cheap cold packs That look like this;
Cheap Cold Packs

Freeze them (usually three) and use them in place of the ice.  Very little if any water to clean up.  Or you could get some Zip Lock Heavy Duty Freezer Bags and put ice cubes from your home freezer in them and use them in place of the bought ice. Another idea for an ice pack is to partially fill a strong zip-type sandwich bag with Dawn dishwashing liquid, close and freeze. The liquid soap stays cold much longer and it can be refrozen many times. The frozen Dawn will conform to the place you need an ice pack. Maybe a bit more water to clean up than you would like.
The Nu-Ice Freezer Pack is a  chemical freezer pack capable of maintaining a sub-zero temperature by putting the pack into an insulated environment for up to 96 hours. This is accomplished by first freezing the special pack to initiate the simple chemical reaction within the pack. 


But you could do even better and help the ice or cold pack by adding an RV fridge fan like this one; RV Fridge Fan.
RV Fridge Fan

It uses 2 D cell batteries (be sure to use alkaline type) and will give you 30 days of use before the batteries need to be changed.  It will reduce your fridge cool down time by half. I use one in my TT and it does work. (just be sure to turn it off before storing the rig).

I know some of you are a bit more high tech than a simple battery operated fan inside the fridge and would like something a bit more.  I reference you here; High Tech RV Fridge Fan.

CAUTION:  Do not run your RV Fridge on GAS while going down the road.  Guys this is very dangerous for a lot of reasons and not recommended by anyone in the know that I have talked to.   I am sure someone will tell you that they have done it for years with no problems.  But it only takes one time, of a fire or explosion or both.

3. What else could you do to help your RV fridge?  You could put a fan on the backside of the fridge inside the outside fridge compartment.  I am talking about the outside compartment in the back of the fridge.  There are several types of this kind of fan.  One type uses a thermostat to sense when there is too much heat, inside the outside compartment, thus slowing down cooling, and turns on the fan.  Or there is the DIY system that uses a 12-volt computer fan that comes on whenever power is turned on to the rig (this is what I use).  Let's look at them both, first the thermostat controlled fridge compartment fan; RV Fridge Outside Compartment Fan
 There is some DIY here as well but a lot less than the system that I use.  Follow the link and read some of the user comments to better understand how this system works.
 RV Fridge Outside Compartment Fan

Next, let's take a look at the one I used; 12 Volt Computer Fan


This is a completely DIY project so please remember that.  I found a convenient place on the inside of the outside refrigerator compartment's grated grill cover and mounted the fan with some zip ties.  I ran the power wire from the fan to the rigs 12-volt power line, that I found inside the refrigerator compartment.  My 12-volt lines were the same color as the fan's wiring. The fan blows air across the fins on the outside of the fridge located inside the fridge compartment.  The power draw is so small I did not worry about it and the fan runs whenever the rigs 12-volt system is on.  The fan is designed to be used in a computer so is whisper quiet. Boy does it work.

4. So we have the fridge getting cold but how cold is it and when can I put in some food?  Well if you do not have a thermometer to measure the temperature then how do you know?  There are two kinds of thermometers one is digital and one is analog.  Let's look at them both.
Digital RV Thermometer Digital RV Thermometer

Digital RV Thermometer
The unit has two sensors one for the freezer and one for the fridge.  The unit runs off batteries and can tell you at a glance from the outside of the refrigerator unit what is going on inside and when your unit is cold enough for food.
Analog RV Thermometer; Analog RV Thermometer
 Analog RV Thermometer
This simple unit hangs from one of the shelves in the fridge and tells you when it is safe to put in your food. The negative thing is that you have to open the fridge to tell if it is ready, letting in more hot air and letting the cold air out.  I am saving for the digital version.

Well, we've got your RV refrigerator humming along but, it is time to go home and park the rig until the next time.
How can you get it cleaned out and dried out fast?  One of these guys should help; Inexpensive Hair Dryer
Inexpensive Hair Dryer
Because I do not dry camp I have the power needed to use this, to dry out the fridge and freezer fast and get going home. Darn, the ice cream is going to melt again.


Until next time.

Sunday, March 24, 2019

Does Your RV Sewer Drizzle & Drool?

Are you afraid to loosen the RV Sewer Cap on your RV because it may drizzle some sewer liquid on your camping shoes or boots?  Do you always have to put a bucket underneath the RV sewer outlet because liquid waste may drool out on the ground and stink up the area?


Well, do I have the solution for you.  There are a lot of reasons why the sewer outlet may leak. A bad shut-off valve, a bad seal somewhere down the line, or even the fact that the RV was not level and the drain could not fully empty.  No matter what the reason the following end of the line shut-off valve will stop the problems.
End Of Wast Line Shut-Off Valve 
 This valve goes on the end of the sewer line and prevents sewer line drizzle and drools.  Following the instructions add this valve to the end of the sewer line and continue to use the sewer cap you already have.
I also strongly suggest that you use a 45-degree clear fitting as the first fitting you put on the sewer pipe after removing the sewer cap.
45 Degree Sewer Pipe
This fitting allows you to see what is coming out of the tank and when the flow is at an end.  You do want to know if that fancy RV toilet paper really does dissolve quickly right?
Please continue reading this Blog to find out more about the sewer and holding tanks in your RV and their proper care and feeding.

And as always wear rubber gloves when handling sewer components.  This is for your safety.
RV Rubber Sewer Gloves


Until next time.

The Weekend RVers is a Facebook Group on RVing with Hints & Tips. A group for the Full-timer as well as the Newbie or Wanna B. In case U can't find us "Facebook.com/groups/Weekend.RVers" we are here hoping you will join us!

And finally, please remember that this blog is an Amazon affiliate. When you order something through any of the Amazon links, it doesn’t add anything to your cost, but I do earn a small commission on everything you buy. Just click on an Amazon link, then shop as usual.

Monday, February 25, 2019

The RV Waste Treatment Tanks (The Black & Grey)

I do not plan on explaining how to dump the grey and black tanks on your RV.  What I would like to do is to explain how to stay out of trouble in dumping your tanks and dis-spell some of the myths on when to dump your tanks.


So what are the main differences between sticks and bricks waste disposal and your RV?  First, there is no worry about getting rid of the waste at your sticks and bricks.  You let water splash into the sink and it just disappears down the drain.  No matter how much water you put into the sink.  You flush the toilet you never have to worry about sewer smell coming back-up and if the toilet gets clogged up you just plunge a few times and presto the waste is gone.

None of the above is true for your RV.  If you put too much water down your sink, you will overfill the grey water tank and the wastewater will flow into your bathtub or shower.  If you leave your waste slinky hose hooked up with the open/close valve on you RV open you will invite sewer gas and some critters, from the campground into your RV.
Do not leave your black tank dump valve open all the time when hooked to the campground sewer line.
Because your toilet is on top of your black water tank there is a limit to how much waste you can put down there as well.  Also if it gets plugged up, plunging it will not help!
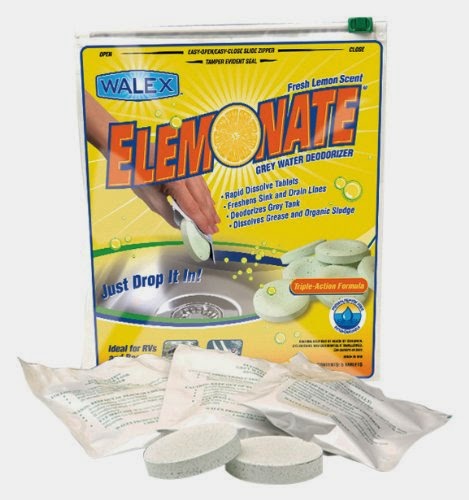
So what to do.  For the smell problem that might occur in the grey water tank, I use Grey Water Tank Smell Killer.  It works. You should put a cup of Dawn Liquid Dish Soap down the kitchen sink once a month to break up grease and oil in the Grey Tank and sink P traps.
Grey Water Tank Smell Killer

As for the water back-up, you should dump your grey tank every two days while camping or sooner if the water starts to back up.  This is the tank you can dump before you leave for home.
The grey water tank should be the last tank you dump before you head for home.  After dumping it you need to add approximately 1 gallon of clean water back into it and one of the grey water tank smell killers and you are good to go.
BLACK WATER TANK

Now the black water tank the scourge of RV camping.  There are a lot of does and don'ts about this tank so let's get started.
No matter what you hear or read almost all of the sensors that are supposed to tell you how full the black water tank is, do not work.  I have been told and it has been proven that the sensors mounted on the outside of the tank do seem to do a better job than those sensors that are inside the blackwater tank.  Most of the crazy ideas floating around about how to make the sensors inside the black water tank work also do not work.  To fix the problem of, the black water tank sensors and how full is the blackwater tank.  So, how do you know when it is time to dump the tank?  Look down inside the toilet and if you see blackwater, hear gurgling, and stuff floating, it's time to dump the tank.
 So what can you do to improve how the black water tank works.
Use only quick dissolving toilet paper in this tank.  Toilet paper made just for RV is fine such as RV 2ply Toilet Paper or septic tank safe toilet paper.  But you can use just about any toilet paper that will quickly dissolve.  To test any brand of toilet paper to see if it can be used,  take a glass jar with a lid.  Fill the jar about 3/4 full and add a single sheet of your toilet paper to be tested.  Put on the lid and give the jar three quick shakes.  If most of the sheet of toilet paper is broken up and coming apart you are ok to use the toilet paper tested.

Check here for more details RV Toilet Paper Safe.

We have safe paper what next?  How about something to get rid of the smell and help break down the waste. I would suggest a Black Holding Tank Deodorizer and Dissolver
Black Holding Tank Deodorizer and Dissolver

This should be added to your black water tank regularly.  I add one tablet after each time I dump my black water tank and another during hot weather if there is a smell problem.
Oxy-Kem 


Here is another possible black tank treatment Oxy-Kem that comes highly recommended.  I have not tried it so I can't comment on how well it works, but I do plan to and will let you know.  I did get a chance to try the Oxy-Kem.  However, it was not very successful.

Here is an all natural black tank cleaner that really cleans the tank as well as the sensors.  I have not tried it myself but all of the reports I am getting say it works. Unique Black Tank Cleaner  I have tried this black tank cleaner and found that I did not like it and have stopped using it.


Lately, I have been using Firebelly Outfitters, Tank Deodorizer.  I use two packs of the deodorizer per black tank.

I have used the product for several months now and have found positive results so far.  Another positive thing is that the people who make and sell this product are RVers.

Do not dump your black tank unless it is full or nearly full.  I know what you must be thinking but we never get it full over a weekend trip.  I realize that maybe the case but, you need to fill it up manually and dump it before you leave the park.
You do not need a hose or make this a big deal just flush the toilet and insert one of these things.
 Johnny Chock


Johnny Chock
          
Let the toilet run for approximately 10 to 15 minutes depending on how full your tank is.  If you can see the water in the black tank from the toilet that is full enough.  Remove the Johnny Chock and store.  Now dump the black tank like you usually do.  Add about a gallon or more of water (you can run the toilet with the Johnny Chock for 2 to 3 minutes and that should do it.  Drop in one of your black tank tablets and you are ready for the next outing.

Never leave the black tank drain valve open.  You are just asking for the smells of your neighbor's sewer to come up into your RV.  Or if you are really unlucky you could get the "black pyramid of death".  Because the liquid drains out of the open drain valve quickly the black solids are left behind and start to pile up.  If air gets into the tank from the open valve and drys out the solids you are really in trouble.  Or if you dump your black holding tank too frequently you will also have a build up of the solid waste.  This is a problem you do not want the black pyramid and could cause a very expensive repair.  To prevent the "pyramid of death" you need to flush your black tank when it is at least 3/4 full and refill it so that there is some water splashing inside as you drive back home.

One of the things you hear and I have tried is to add one cup of cheap dishwashing liquid soap to break-up waste and Calgon to lube the inside of the tank.  Does it work?  I have been using it and have not seen much of an improvement.  I plan on using this in the grey water tank next to see if it makes a difference to that tank.


Quick Guide To Waste Tank Dumping
  1. Grey Water Tank can be dumped anytime.
  2. Use a tank treatment when needed. (to reduce smell and add microbes)
  3. Dump Black Tank when at least 3/4 full.
  4. Add a small amount of water to both tanks after dumping. (up to 2 gallons)
  5. Use the grey water to flush out sewer hoses.


Until Next Time.


Saturday, March 5, 2016

Smoke, Fire, Gas, Oh My!!!

Did you know that there is a date code on the smoke detector as well as your carbon monoxide detector in your RV?  Did you know that the propane detector in your RV has an end of life? 


I sure didn't know.  If you are just changing the detector batteries at the beginning of each RV season and removing the batteries at the end of each season you may not be doing everything you  need to be safe, there is more to it.  When was the last time you tested all your detectors to be sure that they all worked? (In many cases pushing the test button on the detector does not test the most important part of the detector, the sensor.)  Do you know how to test the detectors?  When is the last time you had a fire drill in your RV? 
Let’s look for some answers.  On the back of every smoke detector, there is a date code.  You may have to hunt for it but it is there.

Beginning in 1999, Underwriters Laboratories (UL) required the manufacturing date code on the back of the device to be printed in plain English. This information may appear on the back of the device, on the face of the horn, in the battery compartment or on the top sensing chamber.
It is widely held in the RV industry that if your detector is more than five years old, or is out of date, it should be replaced. 

Some detectors have permanent batteries built-in and others need to be replaced annually.  Always use alkaline batteries when replacing batteries in detectors.  Alkaline batteries last the longest in low power usage situations, such as detectors.

Now let’s talk turkey.  Most RV manufacturers use the lowest cost, simplest smoke detector they can in their rigs.  So false alarms and the possibility of alarm failures are there.  What can you do, upgrade your standard smoke detector to a combination ionization and Photoelectric smoke particle alarm such as the


These alarms have fewer false alarms and will give you and your family more time to get out if there is an emergency. 

Most fire safety experts agree that you have about 20 seconds to get out of an RV that is on fire before you will be overcome and not be able to get out.

Where should I put the smoke detectors in the RV you ask?  One should be in the Master bedroom and one in the Bunkhouse (if your RV has one).  Another one should be located in the kitchen area of the rig. 

There is a new small size model smoke detector for use in storage bays or in areas where the size of the detector is important.
This type of small space detector is a great idea for storage areas where we may have cleaning chemicals and fire-starting chemicals and other stuff that in the right conditions can ignite and start a fire.

You can test smoke type detectors by using a burning candle near the detector and then blowing it out.  See what happens.  Also, you can push the button located on the detector to test the battery.  

Pushing the button just test the battery and the electronics and does not check the sensor inside the unit.  The candle does that.

Next we have the Carbon Monoxide Detector.  This detector looks for the gas from combustion. CM gas is odorless, colorless, and tasteless.  This is a very deadly gas.  Every year there are deaths caused by CM gas when people run gasoline generators outside of their trailer. This detector can be located in the hallway to the bedrooms or in the bedroom itself.  Don't forget to put one in the bunkhouse. The CMD should be located off the floor about head high or higher. In my rig, the detector is located on the ceiling. The CM gas is lighter than air and will be found near the ceiling first.  Here is the one that I have  Battery Operated Carbon-Monoxide Detector. 


NOTE: Be sure to replace the batteries at the beginning of the RV season (remove batteries at the end of season) and keep the surface of the detector clean.

The LP Gas Detector is the last of the required detectors in your RV.  This one usually runs off of the 12-volt battery system of the RV.  It is located very near the floor usually in the hallway to the master bedroom, but not always.  This is the guy that will detect if you stove, oven, furnace, refrigerator, or any other LP gas product in the RV is leaking LP into your breathing space.  LP Gas is heavier than air and sinks to the floor and builds up from there.  It has a bad odor that has been added to the gas by the LP Gas provider.  So LP Gas is not odorless, you sure can smell it.  Unless of course you are sleeping.  If you smell gas get outget out now, do not look for the leak just get out, and get help.

Here is a 12 volt LP Gas detector that has gotten good reviews and could replace what you are currently using if after testing yours does not work or the 5 year replacement date is up.  Remember pushing the test button on a detector does not test the sensor just the electronics and sounder.  Here is a detector that has gotten good reviews 12v LP Gas Detector.

So how do you test one of these?  Remember those BIC lighters and Charcoal Starters?  Well get down near the detector and flick the BIC but do not light it.  Hold the lighter near the detector for a few seconds and you should set the alarm going.  Stop the flow of gas from the BIC and blow on the detector to dissipate the gas and the alarm should stop sounding.
A word of caution here I think is advisable.  I have heard that people are replacing the two gas detectors with one that claims it will do both jobs.  I would not want to bet my family's safety on this all in one detector.  These gasses are not the same weight in the air one rises and one sinks, now how is one detector going to be in the right place to detect the right gas?  Just say'in.

Now let's talk about firefighting.  Don't do it.  Get Out!!!  If you must fight the fire to give yourself and your family more time to get out, do you have the right fire extinguisher?  Here again, in most cases, the cheapest fire extinguisher was installed in your rig.  When was the last time you check the extinguisher?  Now is a good time before you start off for this season.  If it is a powder type, turn it over a few times to resettle the powder.  If it is a squeeze the trigger type what is the date of manufacture?  You should plan on replacing the trigger type ever six years or sooner if the gauge says so.   RVers die every year from rig fires, use the fire extinguisher to give you and your family time to get OUT not to fight the fire.

You need a fire extinguisher in each bedroom, in the kitchen area, and at the front and back door of the RV and in the storage area.  You could also have one under the driver's seat of the TV or Class A. I recommend using 

as the best you can get to give you more time.  If the kids are old enough be sure they can operate the Fire Gone and be sure to put one in the bunkhouse.


Because of recent fire events, the following fire suppression device was developed RV Refer Compartment Fire Suppression.


Because of the number of fires that have been caused (or thought to have been caused) by refrigerators in RVs, an automatic fire suppression system has been developed, shown above.  This system is one the average RVer can install and will activate in the presence of a fire in the refrigerator compartment of an RV.  While you still need to get out as quickly as possible this unit may put the fire out completely or give you more time to get out, either way, it is a plus.


OK the fire drill.  Do you know how to get out of your Rig if the front door is blocked by fire?  In each bedroom area of the rig as well as other locations you will see a window with a red lever at the bottom.  With the word EMERGENCY EXIT printed on it.  Move the handle in the direction indicated and the window will open and you can climb out.  Of course, it will be a real job because you may have forgotten a few tools that will help make it easier.  First did you have your emergency window prop open stick?  If you said no, you should.  Take an old broom handle, rake handle, hunk of PVC, etc, and cut it to 24" long and paint it red.  Attach two dots of hook and loop to the top and bottom of the stick and to the wall, alongside, or below the window and voila you are ready.  When the emergency occurs, open the window put in your prop stick and pull a blanket or comforter from the bed or a blanket from other area and lay it across the bottom of the window frame covering the exit handle area of the window.  This will stop you from being cut or badly scratched by the window frame as you crawl out.

Have a meeting place well outside of the rig area, that everyone knows and will meet at if there is a fire so you can take a head count and be sure everyone is safe.

Last but not the least.  Do the kids know how to get out?  Each season before you hit the road you should go over the fire safety rules and how to get out.
Rule number,
1. GET OUT
2. GET OUT
3. NEVER FIGHT THE FIRE (you have approx 20sec to get out before you can't)
4. DO NOT GO BACK FOR THE DOG, CAT or GOLDFISH
5. EVERYONE MEETS ACROSS THE ROAD

I am sure you get the picture.  Cats and dogs are part of the family for sure, but they are not humans and the kids and grandma are far more important.  Be sure to remind the kids of that.

 Fire Safety Quick Check
1. Test all Fire, LP Gas, and CM detectors
2. Do not fight the fire GET OUT!!!!
3. Know where the emergency exits are located
4. Have an escape plan
5. Have fire drills
6. Be sure the fire extinguishers are up to date


Until next time

Don't forget to join the Weekend RVers group on Facebook a no DRAMA place with Hints, Tips, Free Stuff, Recipes, for every kind of RVer.

And finally, please remember that this blog is an Amazon affiliate. When you order something through any of the Amazon links, it doesn’t add anything to your cost, but I do earn a small commission on everything you buy. Just click on an Amazon link, then shop as usual.

Sunday, February 14, 2016

911, What Is Your Emergency? ----- Water!!!

Have you ever opened the Kitchen or Bathroom under sink cupboard doors only to find the contents wet or a bit damp?  To make  matters worse, you are dry camping (boon docking) and have no one around to ask what to do.  Well, wonder no more just keep reading to find out.


First you need to find the source of the leak.  This could be from water seeping around the top of the sink and draining inside the cupboard.  This is a simple and quick fix. Just use some Kitchen and Bath approved caulk, such as,
Follow the instructions on the tube and that water seepage should be a thing of the past.  I keep a tube of this product in white and clear in the RV all the time because you just never know.  But, what if that is not the problem?  
Next check all the black sewer pipes to be sure the fittings are good and tight.  The black drain pipe fittings should be hand tight not wrench tight.  Do be careful not to over tighten these fittings as you can break the pipe or strip out the plastic threads on the pipes.  I check these fittings every time in the Spring before the first camping trip and several more times during the year to be sure they are tight and doing just fine.  I did find a loose one in the Master Bathroom last year.  So all the black pipe fittings are tight and you still find water and things damp.  Now, what?
Well, there is really only one thing left.  The hot and cold water fittings.
From the picture above you can see the red (hot) and, in this case, the white (cold) water lines as well as the black plastic sewer pipes. Getting a bit closer, we see where the problem is.

The metal clip that holds the screw on connector has come a bit loose and the water is dripping out from that fitting on to the stuff under the sink.  It is not a flood but a constant drip.  This scenario is not good for lots of reasons and needs to be taken care of right now.  If you do not have the PEX crimping tool you will never get the metal squeezed tight enough to stop the slow leak.  
There is a quick and sure-fire way to fix this problem and end up with a far better connection than what the RV manufacturer used.  It is called a Shark Bite connector.
This is a push-on type of connector for the plastic hose and does not need any special soldering or tool to install.  You just cut off the leaking end and push on the Shark Bite.  Screw the female end to the faucet and you are good to go.
Please note to double check that after you cut off the old leaking connection, that you will still have enough plastic pipe to reach back to the faucet once you put on the Shark Bite.  The plastic pipe used in most RVs is 1/2" and the Shark Bite Connector you will need is the 1/2" type.  This connector is available in most hardware stores and the Big Box retailers of plumbing supplies. The packaging looks like below.

The package and product at my big box retailer was not hanging just stuffed  into a box on the shelf so I had to look a bit for it. 
So here is what I ended up with.
You can see on the red plastic pipe what I had before the switch and you can see by the white pipe what I have now.  My plan is to change over the red pipe connector to a Shark Bite type to ensure no more future leaks from this area.

Here is a convenience add on that I bought, just to help in replacing future connections with Shark Bite.  It is called the Shark Bite Deburring Tool. After cutting the old fitting off the PEX plastic pipe, you use this tool to deburr the pipe and the tool shows you how much of the plastic pipe you have to push into the Shark Bite connector to make a good water tight seal.
Again this tool is not mandatory.  It is just a nice convenience tool to have around.  One last tool you might want to pick up is the PEX plastic pipe cutting tool.  Again not a mandatory tool to have just a nice tool to have.
Well, that is it.  If you have a water leak anywhere even a constant drip you need to fix it fast and the Shark Bite pipe fitting system is the fastest and easiest system I know of.  I keep a couple around because you just never know when you will need them and the cost is cheap insurance against a faucet connection leaking and damaging the rig.


I would like to thank Michael Cook who's Facebook posting gave me the idea for this post.

Until next time.

Don't forget to join the Weekend RVers group on Facebook a no DRAMA place with Hints, Tips, Free Stuff, Recipes, for every kind of RVer.

And finally, please remember that this blog is an Amazon affiliate. When you order something through any of the Amazon links, it doesn’t add anything to your cost, but I do earn a small commission on everything you buy. Just click on an Amazon link, then shop as usual.